Übersicht: Tipps, Tricks und Tutorials im Vektorgarten
Stylish guilloches with gradients
This method is only needed for Illustrator versions older than CS6. In CS6 and above you can assign gradients to strokes.
See how it looks like:

Start the guilloches using the common method: Take the Pen-tool and draw two swirly open paths. This is very important since this method only works with open paths.
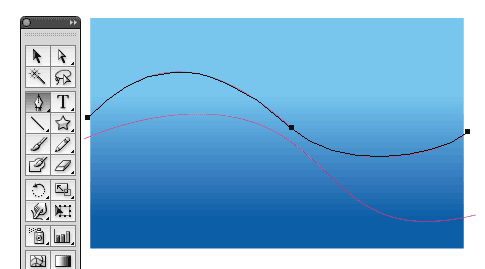
Figure 1: two open paths - of course you can add more if you like.
If you wanted to have “normal“ guilloches you would now blend them and were done. But we want to go a little further.
The next step seems particular: delete the strokes of both paths and set their stroke to “None“.

Figure 2: both paths have a fill and stroke of “none“
Then assign Effect > Path > Offset Path. For sake of simplicity the effect should be assigned to the whole path, not only its fill or stroke.
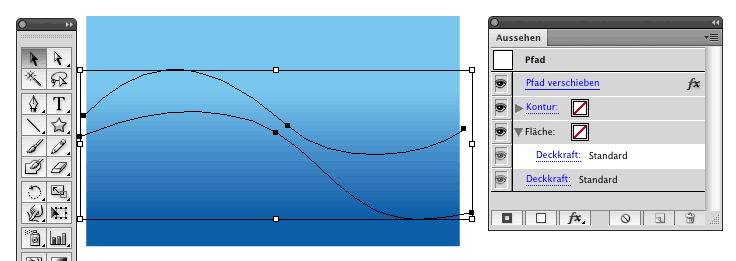
Figure 3: Both paths have the effect “offset path“ (appearance panel on the right)
As path offset enter a value of half the stroke width you want to achieve. The offset takes place to both sides of the path. If you want to enter a different unit than automatically entered in the dialog box, just type its abbreviation directly after the value, e.g. Pt for Point.
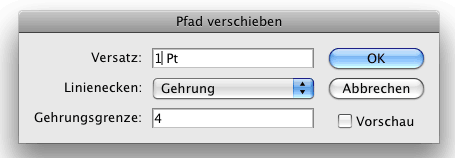
Figure 4: Entering the offset value into the effect‘s dialog box
Now you chose the gradients for both the paths‘ fills. You can chose different gradient colors, but you can only have an opacity of 100% for the gradient colors.
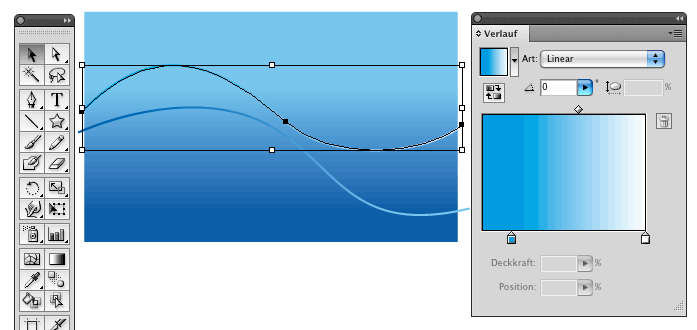
Figure 5: Looks like the gradient is applied to the stroke, but of course you know that it‘s different.
Before you proceed, take a minute to compare the settings in your appearance-panel to Figure 6. If there are differences - no problem - you can just drag and drop an entry to edit the appearance‘s hierarchy.
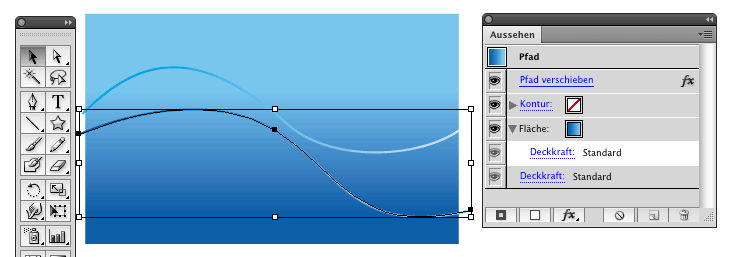
Figure 6: the path‘s apperance should look like this
You can reduce the object‘s opacity:
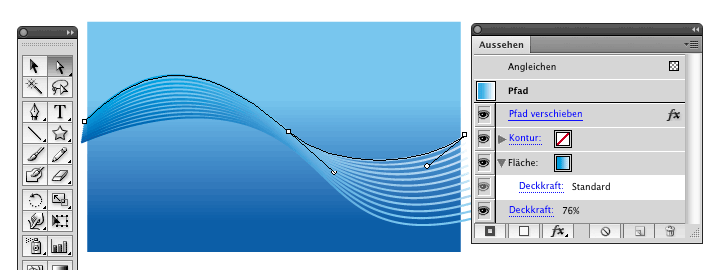
Figure 7: the opacity (bottom entry “Deckkraft“) was reduced. Notice that this is applied to the object, not just parts of it.
Finally we get to blending the objects. Select both paths and press Cmd/Ctrl + Opt/Alt + B. Double click the blend tool in the tool panel and enter the desired number of steps.
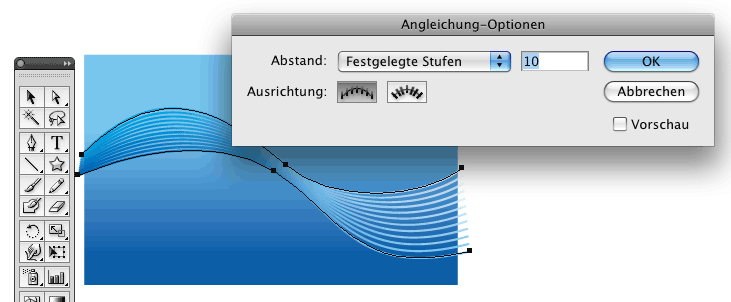
Figure 8: Entering the number of steps
See other English tutorials:
How to set up a file: vector/raster, color mode, resolution, file format
Mysterious things Illustrator does - Saving files (Video on Vimeo)
EPS – the zombie of file formats
Saving safely
Saving legacy files
Long Shadows with Illustrator
Creating a pentagonal pattern
Problems with align to pixel grid
Aligning and distributing - Special
Freeform-artbrush with a gradient or clipping objects using an opacity mask
Pathfinder doesn‘t react
Outline object and outline stroke
Optimize your workflow in Illustrator
3D-Animation
© Monika Gause, 2010/2017 . Impressum/Datenschutz . Grafik . mediawerk
